
In the world of automotive detailing, there’s a long-standing debate among car enthusiasts and professionals alike: Should you polish your car before applying wax? In this comprehensive article, we’ll dive deep into the topic and provide you with the necessary steps and information to ensure your car’s paintwork looks its absolute best.
Whether you’re a seasoned car enthusiast or new to the world of automotive detailing, you’ll find valuable insights that will help you make an informed decision and achieve a showroom shine on your car.
Polishing Vs. Waxing – Understanding the Difference
Before we delve into whether you should polish your car before applying wax, it’s essential to understand the key differences between these two processes.
1. Polishing
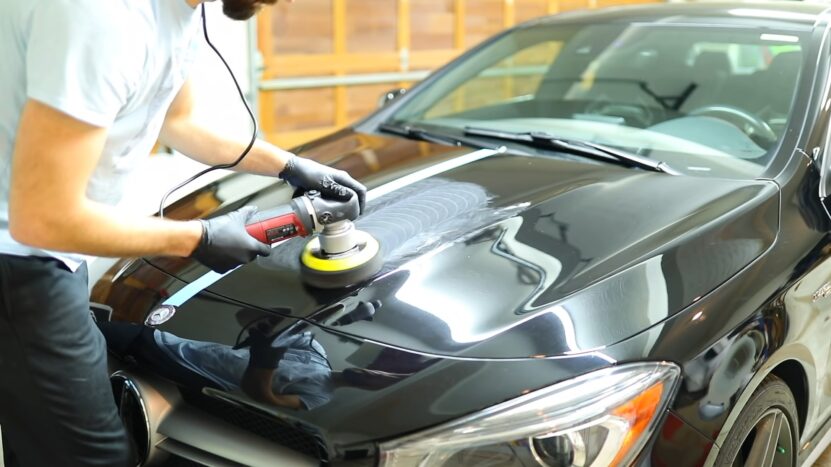
Polishing is a process that involves the use of abrasive compounds to eliminate or minimize surface imperfections such as swirl marks, scratches, and oxidation. This process smoothens the paint surface and restores its original shine. Polishing is typically done using a dual-action (DA) polisher or rotary buffer, along with polishing pads and a suitable polishing compound.
2. Waxing
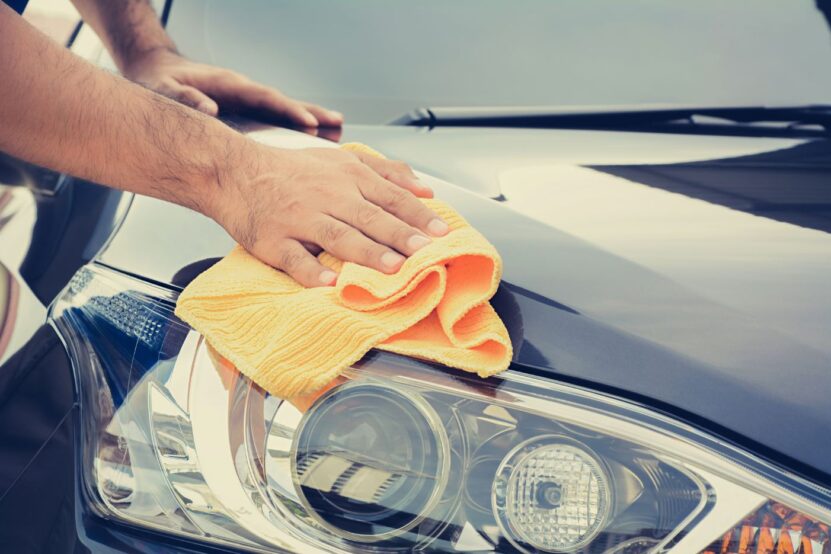
Waxing, on the other hand, is the process of applying a protective layer (usually made from natural carnauba or synthetic polymers) to the paint surface. This layer not only adds gloss and depth to the paint but also protects it from environmental factors like UV rays, bird droppings, and tree sap. Waxing is generally the final step in the detailing process and should be done after polishing (if needed) to seal and protect the paint.
The Benefits of Polishing Before Waxing
Now that we have a clear understanding of the differences between polishing and waxing, let’s explore the benefits of polishing your car before applying wax.
1. Removes Surface Imperfections
Polishing your car before waxing ensures that surface imperfections like scratches, swirl marks, and oxidation are effectively removed. This not only enhances the appearance of your car’s paintwork but also provides a smooth and clean surface for the wax to adhere to, which ultimately improves the longevity and effectiveness of the wax.
2. Improves Paint Clarity and Gloss
Polishing your car’s paintwork restores its original shine and clarity by removing the layer of oxidation and smoothing out any imperfections. This results in a high-gloss finish that is further enhanced by the application of wax, giving your car a stunning, showroom-quality appearance.
3. Prepares the Surface for Wax
Polishing your car before waxing ensures that the paint surface is clean and free of contaminants. This creates a strong bond between the wax and the paint, ensuring that the protective layer is durable and long-lasting.
The Polishing Process – Step by Step
Now that we’ve discussed the benefits of polishing your car before applying wax, let’s take a look at the step-by-step process of polishing your car.
Step 1: Preparation
Before you begin polishing, it’s essential to thoroughly clean and dry your car. This removes any dirt, dust, and debris that can interfere with the polishing process or cause further damage to the paint.
- Wash your car using a pH-neutral car shampoo and a microfiber wash mitt.
- Rinse the car thoroughly, ensuring that all soap residue is removed.
- Dry your car using a microfiber drying towel or a car dryer to prevent water spots.
Step 2: Choose the Right Polishing Products
Selecting the right polishing products is essential for achieving the best results. Here’s what you’ll need:
- Dual-action (DA) polisher or rotary buffer: These tools provide the necessary power and precision for effective polishing.
- Polishing pads: Choose a variety of foam or microfiber pads with varying levels of aggressiveness to match the condition of your paint.
- Polishing compound: Select a compound that matches the severity of your paint imperfections. Start with a less aggressive compound and move to a more aggressive one if needed.
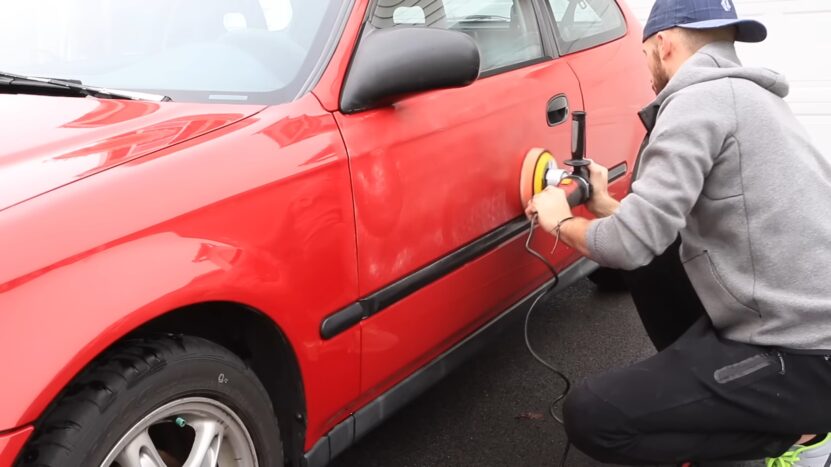
Step 3: Test a Small Area
Before you start polishing the entire car, it’s crucial to test a small, inconspicuous area to ensure that your chosen polishing products and techniques produce the desired results.
- Apply a small amount of polishing compound to the test area and spread it evenly using the polishing pad.
- Set the polisher to a low speed and gently work the compound into the paint using overlapping passes.
- Wipe off the residue with a clean microfiber towel and inspect the results. If you’re satisfied with the outcome, you can proceed to polish the entire car. If not, adjust your technique or products accordingly.
Step 4: Polish the Entire Car
Now that you’ve tested your polishing products and techniques, you can proceed to polish the entire car. Follow these steps:
- Divide your car into sections (e.g., hood, fenders, doors, etc.) to ensure a systematic approach.
- Apply the polishing compound to the pad and spread it evenly over the section you’re working on.
- Set the polisher to a low speed and gently work the compound into the paint using overlapping passes. Gradually increase the speed as needed.
- Continuously monitor your progress and adjust your technique or switch to a different polishing pad or compound if necessary.
- Once you’ve achieved the desired level of paint correction, wipe off the residue with a clean microfiber towel and move on to the next section.
Step 5: Inspect and Refine
After polishing the entire car, it’s essential to inspect the paintwork for any remaining imperfections or areas that need further attention. Use a handheld LED light or sunlight to carefully inspect the paint surface. If you find any remaining imperfections, repeat the polishing process on those areas until you achieve the desired results.
Applying Wax – Step by Step
With the polishing process complete, it’s time to apply wax to protect and enhance your car’s paintwork. Follow these steps:
Step 1: Choose the Right Wax
Select a high-quality car wax that matches your preferences and needs. You can choose between natural carnauba wax, which offers a deep, warm glow, or synthetic polymer-based wax, which provides a slick, glossy finish and extended durability.
Step 2: Application
Apply the wax using a foam or microfiber applicator pad, following these steps:
- Ensure that the car’s surface is cool to the touch and free of dust and debris.
- Apply a thin, even layer of wax to the applicator pad.
- Using a circular or straight-line motion, spread the wax evenly across the paint surface, one section at a time.
- Allow the wax to haze (typically within a few minutes) before buffing it off.
Step 3: Buffing
Buff off the haze wax using a clean, high-quality microfiber towel. Use gentle, overlapping motions to remove the wax residue and reveal a glossy, protected finish.
Final Words
Polishing your car before applying wax is an essential step in achieving a showroom-quality finish. It not only removes surface imperfections and restores your car’s paintwork to its original shine but also ensures a strong bond between the wax and the paint surface, resulting in a durable and long-lasting protective layer. By following the step-by-step processes outlined in this article, you can confidently polish and wax your car, achieving a stunning appearance that will turn heads wherever you go.